
How to Setup and Use the ATAS Trading Platform
This course is platform-independent, which means the concepts and strategies taught can be applied using any trading platform that offers key tools such as the Price Ladder (DOM), Market and Volume Profiles, and Footprint charts.
If you already have experience with a platform and are comfortable using it, you are welcome to continue using it throughout the course.
If you are new to futures trading and do not yet have a platform, we recommend the ATAS Trading Platform. Please follow the steps below to create your ATAS account.
How to setup ATAS
Step 1 – Create an ATAS account by clicking HERE. On the ATAS website, click the “Try it for free” button. In the Sign Up modal, enter the same email address used for your Axia Futures portal account, then click the “Sign Up” button. If you already have an ATAS account registered with that email address, please proceed directly to Step 3.
Step 2– You will receive an email from ATAS with the subject line “Your Access to the Atas Platform”, which will include your login credentials. Please follow the instructions in the email to confirm your email address, then click “Download ATAS for Windows” to download ATAS.
Step 3 – Please fill in the form below to request a 1-month free upgrade to the ATAS Ultra Top tier package, exclusive to students of the 4-week Career Programme. Once your ATAS account has been upgraded, you will receive an email with the subject line “Your ATAS Ultra License for the AXIA Course”.
Step 4 – If you do not already have Rithmic market data, please follow the instructions in the ‘How to Setup Rithmic CME market data‘ section. If you already have Rithmic market data, you may skip this step.
Step 5 – Launch ATAS and log in to the platform.
Step 6 – To connect to the live Rithmic CME market data, click the “Connections” icon from the “Home” toolbar, then click “Add”. Select “Rithmic” from the list of data providers and click “Next”.
Enter a connection name, then under Connection Settings, enter your Rithmic login name and Rithmic password. Leave the default server as “Rithmic paper trading. Chicago Area”. Under Market Data, ensure that “Connect via RTrader Pro” is ticked, as this is required.
Finally, click “Finish” to create the new connection.
Step 7 – Before connecting, please make sure you are logged in to R|Trader Pro. If you have not yet downloaded R|Trader Pro, you can download and install it from the Rithmic official website.
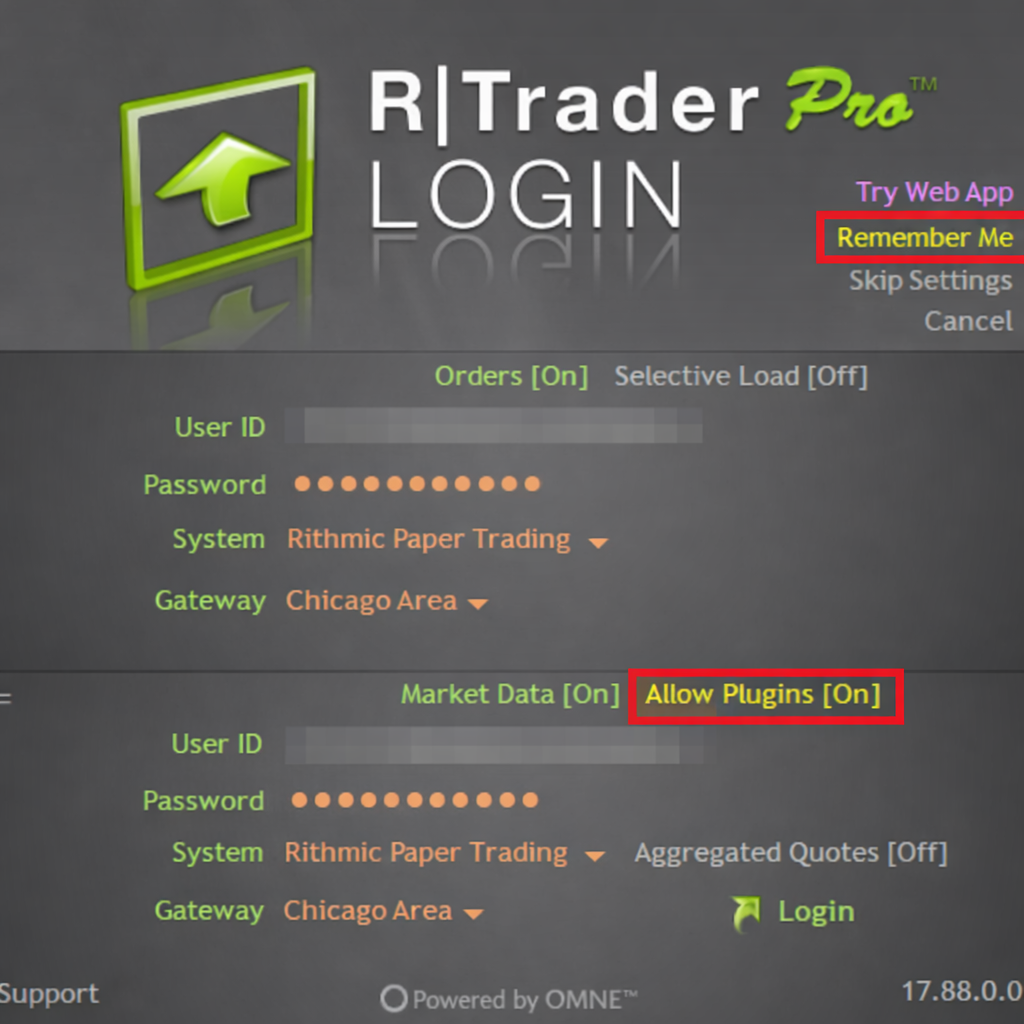
Step 8 – Launch R|Trader Pro. On the login screen, enter the following details on both the Orders and Market Data sections and click Login:
- User ID: Enter your Rithmic User ID
- Password: Enter your Rithmic account password
- System: Select ‘Rithmic Paper Trading’
- Gateway: Select ‘Chicago Area’
- Allow Plugins: Click ‘Allow Plugins‘ to turn it on. When it is enabled, it will be highlighted in yellow and show Allow Plugins [On]
- Remember Me (optional): Click ‘Remember Me‘ if you want R|Trader Pro to remember your User ID and password
Step 9 – Once you have logged in to R|Trader Pro, return to ATAS and click the “Connect” link on the new connection to connect to the Rithmic Paper Trading environment.
Instructional Video – How to setup ATAS
[VIDEO PLACEHOLDER]
Instructional Video – How to Use ATAS
[VIDEO PLACEHOLDER]